
TL;DR
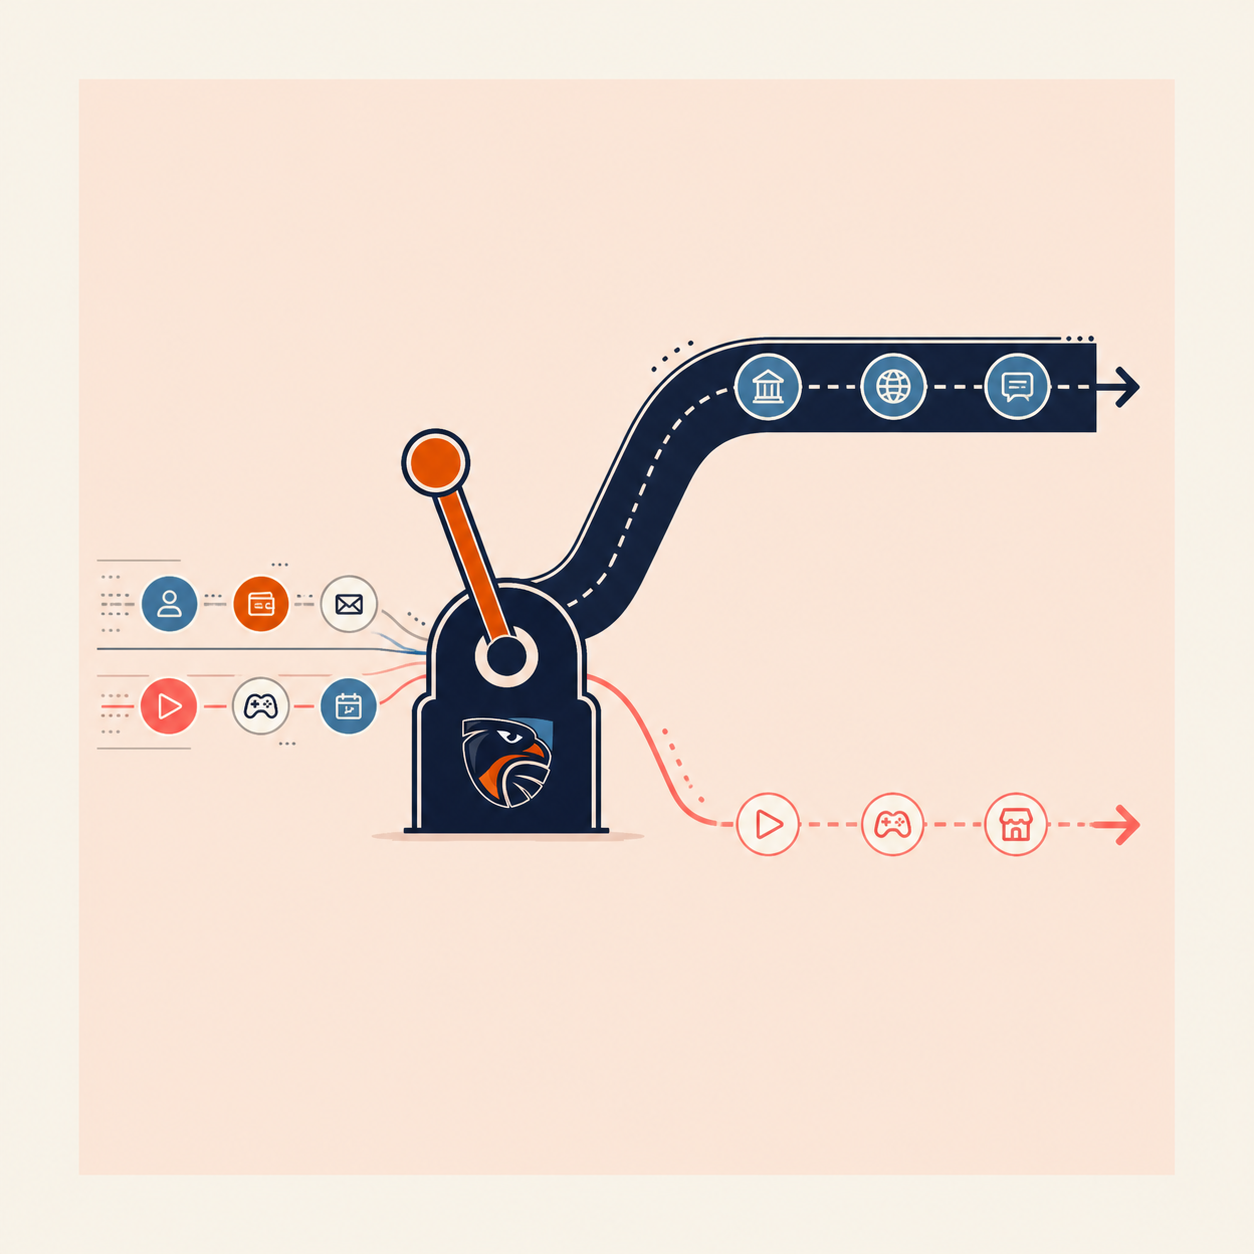
- Enable split tunneling in the KeenVPN app to encrypt only high-risk IoT traffic.
- Route cameras, door locks, and voice assistants through the VPN; let low-risk bulbs and plugs use your ISP directly.
- Typical KeenVPN plans start at $5.99/month, giving you unlimited data and global servers.
- Setup takes three clicks: open app → select split tunneling → choose IoT apps → go.
Understanding Split Tunneling for IoT Devices
VPN for IoT security is more than a buzzword; it’s a practical way to shield data that travels from sensors to the cloud. Split tunneling gives you granular control: you decide which packets are wrapped in encryption and which bypass it. This approach solves two common problems. First, many smart devices have limited processing power, so heavy encryption can slow them down. Second, home bandwidth is often shared between work-from-home video calls and streaming, so you don’t want every byte to be routed through a remote server.
KeenVPN’s split tunneling UI is designed for non-technical users. The app lists every installed program, and you can search for “Camera”, “Thermostat”, or the name of your hub software.
Why Split Tunneling Matters for Low‑Power Devices
Most consumer‑grade IoT gadgets run on microcontrollers with clock speeds under 200 MHz and have memory footprints measured in kilobytes. When a full‑tunnel VPN forces these devices to perform AES‑256 encryption on each outbound packet, you often see a 30‑40 % increase in CPU usage. That extra load can manifest as delayed motion detection on a security camera or a laggy response from a smart thermostat. By routing only the high‑value traffic through the VPN, you keep the device’s processor free for its primary function while still protecting the most sensitive data streams.
In addition, many low‑power devices communicate over protocols such as Zigbee, Z‑Wave, or Thread, which already incorporate link‑layer encryption. Adding another layer of VPN encryption is redundant and can cause packet fragmentation, leading to dropped messages. Split tunneling respects the device’s native security model and only adds a VPN layer where it truly adds value—typically on Wi‑Fi or Ethernet‑connected devices that expose ports to the public internet.
Performance Impact and Bandwidth Management
When you route a 1080p video feed from a smart doorbell through a VPN server located on another continent, the round‑trip latency can climb from 20 ms to 150 ms. That delay is noticeable in the live preview and may cause motion‑triggered recordings to miss critical frames. KeenVPN mitigates this by offering “edge‑optimized” servers that sit within the same data‑center region as the cloud services your devices use (e.g., AWS us‑east‑1 for Amazon Alexa). Selecting an edge server reduces latency to under 30 ms, preserving real‑time responsiveness.
Bandwidth throttling is another consideration. Split tunneling lets you allocate a maximum bandwidth ceiling for VPN‑protected traffic. In the KeenVPN app you can set a limit such as 5 Mbps for camera streams, ensuring that the VPN tunnel never saturates your home internet and leaves enough headroom for video calls or 4K streaming on other devices. The app also provides a visual bandwidth meter that updates every second, so you can spot spikes and adjust limits on the fly.
Step‑by‑Step Configuration in the KeenVPN App
- Launch the app and sign in. After authentication, the home screen shows your current connection status and a quick‑access button labeled “Split Tunneling”.
- Enable split tunneling. Tap the toggle; a modal window appears with three tabs: Applications, Devices, and Advanced Rules.
- Select devices. In the Devices tab, you’ll see a list auto‑populated from your router’s DHCP table. Use the search bar to filter for “Cam”, “Lock”, or any custom device name you assigned in the device’s own app.
- Assign routing. Drag each high‑risk device into the “VPN‑Protected” column. Low‑risk devices stay in the “Direct‑Internet” column. For devices that appear under “Unknown”, click the Identify button to fetch the MAC address and vendor details.
- Configure advanced rules (optional). If you have a smart hub that aggregates multiple sensors, you can create a rule that routes all traffic from the hub’s IP address through the VPN, regardless of the individual sensor’s classification.
- Save and apply. Press the green checkmark. KeenVPN restarts the tunnel, and a brief toast notification confirms which traffic is now encrypted.
All changes take effect immediately, and you can revert to a full‑tunnel configuration with a single tap if you ever need to troubleshoot connectivity issues.
Common Pitfalls and How to Avoid Them
Device discovery failures. Some older IoT gadgets use static IP addresses that don’t appear in the router’s DHCP lease table. In such cases, manually add the device’s IP address in the Advanced Rules tab and mark it as VPN‑protected.
DNS leaks. Even when traffic is split, DNS queries may still be sent to your ISP’s resolver, revealing the domains your devices contact. KeenVPN’s built‑in DNS leak protection forces all DNS requests from VPN‑protected devices to use the provider’s encrypted DNS servers (e.g., 1.1.1.1 over DoH). Verify the setting under Network → DNS Protection.
Incompatible firmware. Certain smart cameras only support HTTP (port 80) and refuse to operate over a VPN that forces TLS. Check the manufacturer’s documentation for “VPN‑compatible” firmware releases before adding the device to the protected list.
Integrating with Smart Home Hubs
Most households centralize IoT control through a hub such as Samsung SmartThings, Apple HomeKit, or a third‑party open‑source platform like Home Assistant. These hubs act as a gateway, translating Zigbee or Thread traffic into Wi‑Fi packets that travel to the cloud. By placing the hub itself in the VPN‑protected group, you automatically secure every downstream sensor without having to configure each one individually.
When you protect a hub, be mindful of the hub’s own update schedule. Firmware updates often download large packages; routing those through a VPN can delay the process. KeenVPN lets you set a temporary “pause VPN” rule for a specific time window (e.g., nightly at 02:00 AM) so that updates download quickly, then re‑enable protection afterward.
Monitoring and Auditing VPN Traffic
KeenVPN includes a built‑in traffic logger that records the amount of data transferred per device, the remote endpoint IP, and the encryption protocol used (e.g., WireGuard vs. OpenVPN). Access the log via Settings → Activity Log. For privacy‑focused users, the log can be set to automatically purge entries older than 30 days.
To verify that a device’s traffic is truly encrypted, you can run a packet capture on a spare laptop connected to the same network. Look for the presence of the VPN’s virtual interface (e.g., tun0) and confirm that packets destined for the device’s cloud service are encapsulated in the VPN’s UDP port (usually 51820 for WireGuard). This hands‑on verification is especially useful for security auditors or for users who want to demonstrate compliance with internal policies.
Balancing Security and Convenience
While it’s tempting to protect every single IoT gadget, doing so can create a single point of failure: if the VPN connection drops, all devices become unreachable. KeenVPN’s kill‑switch feature solves this by automatically cutting network access for any device marked as VPN‑protected when the tunnel goes down. However, you may still want to maintain local control for critical safety devices (e.g., smoke detectors). In those cases, keep the device out of the protected list but enable the hub’s built‑in local‑only mode, ensuring it can still trigger alarms even without internet connectivity.
Another convenience feature is “auto‑reconnect”. If a device temporarily loses Wi‑Fi and reconnects, the KeenVPN app re‑applies the split‑tunneling rules without user intervention. This seamless experience is essential for devices that move around the house, such as robot vacuums that dock in different rooms.
Advanced Options for Power Users
Power users can define custom routing tables using the Advanced Rules tab. For example, you might route all traffic from devices that communicate on port 443 (HTTPS) through a “high‑security” server in Switzerland, while sending port 1883 (MQTT) traffic to a low‑latency server in the same region as your MQTT broker. This granular control is achieved by entering CIDR blocks, port numbers, and the desired VPN endpoint in a simple form.
For those comfortable with command‑line tools, KeenVPN provides an export function that generates a .conf file compatible with standard WireGuard clients. You can then import this configuration into a dedicated Raspberry Pi that acts as a local VPN gateway, further reducing latency for devices that support static routes.
Finally, if you run a home lab with virtual machines, you can bridge the VM’s virtual NIC to the KeenVPN virtual interface, extending split tunneling to containers and Docker services that host custom IoT dashboards. This setup enables you to monitor and control devices from a self‑hosted UI while still keeping the data encrypted end‑to‑end.
References
- Internet of Things security - Wikipedia -- General overview of IoT security challenges
- U.S. Cybersecurity & Infrastructure Security Agency. IoT Guidance -- Official recommendations for securing IoT devices
- KeenVPN Official Features Page -- Details on split tunneling and other features
.png)

No comments yet. Be the first to share your thoughts!
Leave a Comment